
| Pros | Cons |
| 1. Enhanced privacy through built-in VPN and tracking protection. | 1. Lesser-known, with smaller development and support community. |
| 2. Customizable browsing experience for user preferences. | 2. Possible compatibility issues with websites and extensions. |
| 3. Ad-free browsing for faster page loading times. |
Aezakmi Browser — Overview, configuration of anti-detect browser
Aezakmi Browser is a tool for super-private users on the Web. This browser will hide all requests and data about the user on the Web. All your actions in it will remain anonymous. The browser started its work not so long ago and has already managed to find many users among SMM and advertising specialists, affiliate marketing specialists, as well as people who are involved in betting, gambling, etc. Today we will take you closer to Aezakmi Browser and tell you how to set up an anti-detect browser.
When you open a browser, a proxy server is launched, which replaces your real account with a fake one. This is the “anti-detect” function, which ensures anonymity. In addition, Aezakmi allows you to register several accounts at once, for ease of use and delimitation of accounts to fit your needs.
Guide on how to configure the browser
Step 1. Sign up

You will need to sign up on the official website of the browser to start using the Aezakmi browser. It’s pretty easy to do this. Enter your details in the needed fields and verify your email. When the mail is confirmed, your account will become active.
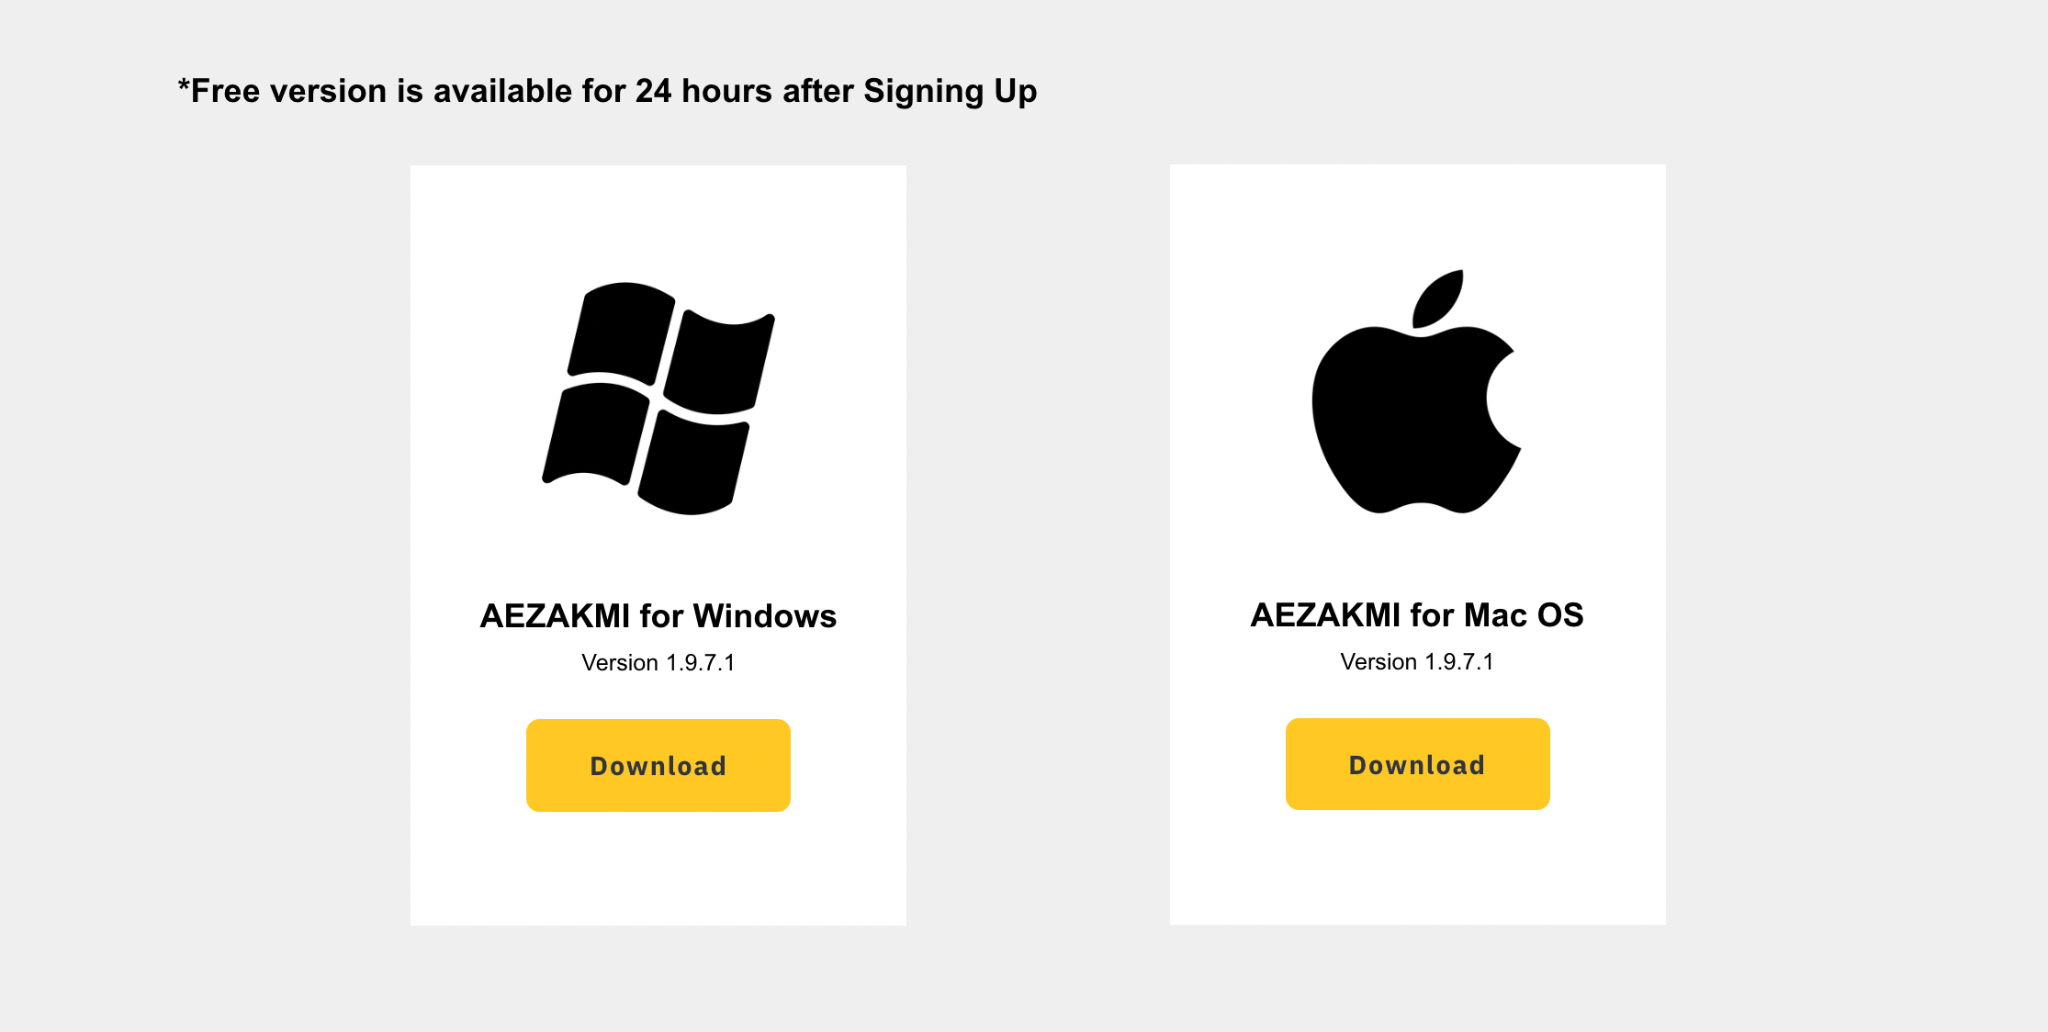
Step 2. Installation
Now you need to install Aezakmi. Go to the official website of the company and select the type of operating system of your computer to install the browser. When the browser is installed, it is recommended to reboot the device in order for the installed software to work.
Step 3. Logging in browser
Before proceeding with this step, you should understand the difference between a browser profile and a fingerprint.
The browser profile is the Aezakmi software you installed, which will be used to surf the Internet. There can be several profiles, so it will be more convenient to switch between tasks that you need to complete.
Browser fingerprint is a plug-in that allows you to remain anonymous, the fingerprint setting is done in the user account.
After installing Aezakmi, you will have 3 icons.
The first is the browser profile — “Aezakmi Browser 1”, which you can log into and start using it.
The second one is “CreateNewBrowserProfile”. There you can create another browser profile.
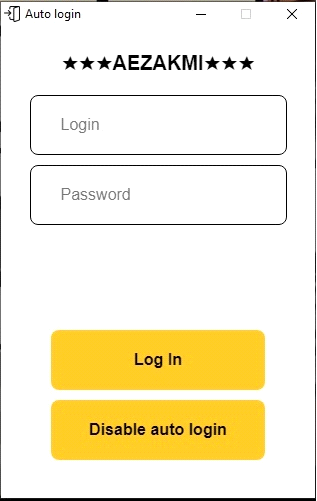
Alt: Enabling the “AutoLogin” function for the Aezakmi browser
Title: Activating “AutoLogin” in Aezakmi
And the third is “AezakmiAutoLogin”, which allows you to save your account details so that you do not have to enter them every time you want to go to the browser. Enter the data in the autologin plugin to get rid of extra hassle.
Step 4. Create a new profile
You can create as many browser profiles as you need. Simply click on the “CreateNewBrowserProfile” icon to do it.
Note that you can rename the profiles however you like and add them to different folders.
Step 5. Create a fingerprint.
When you log into your account, you will be prompted to create a fingerprint in the form of a pop-up window. You need to enter 4 parameters in this pop-up window, for which the corresponding fields are highlighted, to create a print in the standard way.
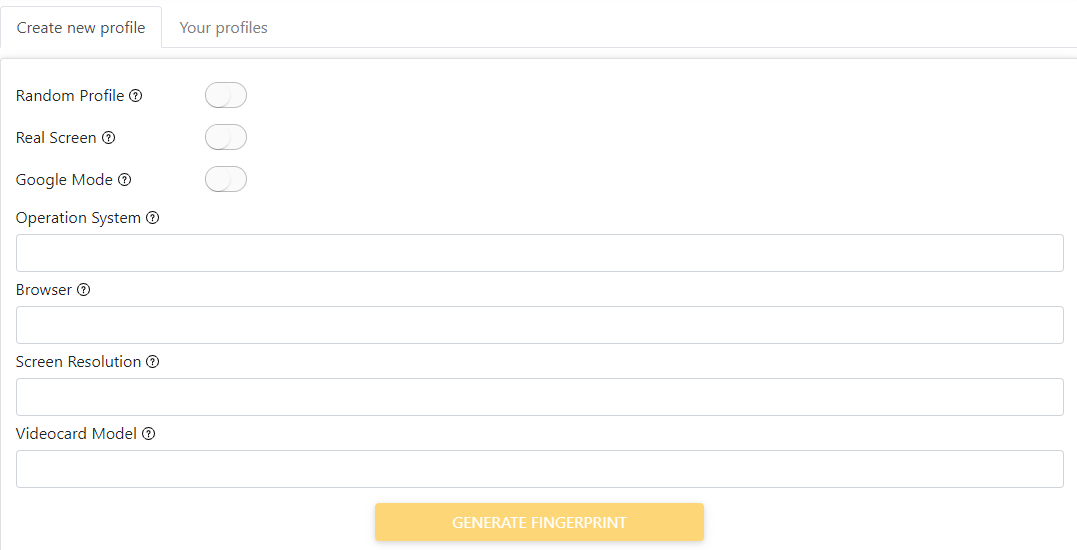
- Your operating system.
- Browser type.
- Your screen resolution.
- Model of your video card.
When the data is entered, click “Generate” and you will create a fingerprint.
Step 6. Proxy configuration
You now have a browser with a profile and fingerprint. It’s time to deal with the proxy. You need to go to the tab that opens when you click on Enable Proxy to make your proxy work. Here you have to follow the following steps:
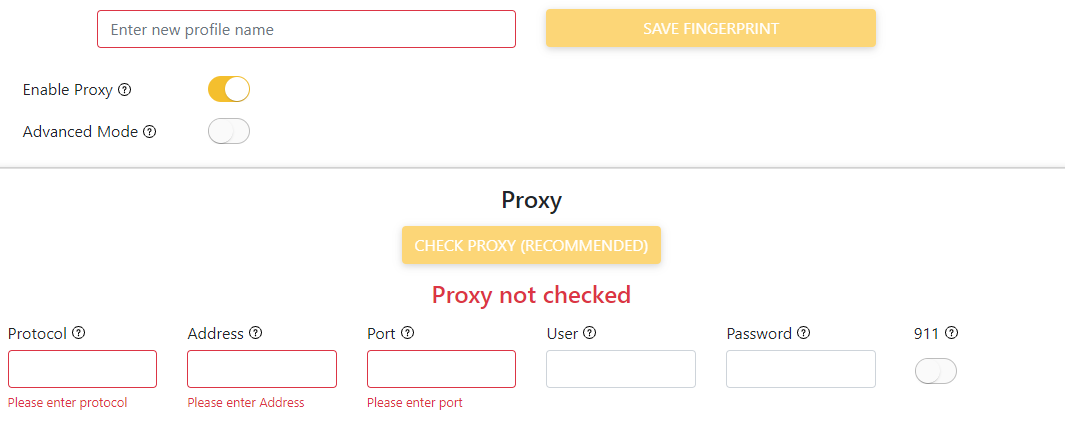
- Designate the protocol type.
- Specify ip address.
- Next, enter the port number.
- Insert login and password.
- Click on the “Check Proxy” button.
- If you did everything right, then “Your Proxy Is Working” will appear.
Your Aezakmi browser setup is now complete. You can start working.
Step 7. How to get started in the browser
Go to the built-in Aezakmi extension. Here you can select the browser profile you need at that moment. To start the profile, click on “Start”.
Subscription plans
- Only registered users will be able to use Aezakmi for 24 hours only. This is done so that a person decides on the choice of browser. And if he decides to use the browser further, the following plans will be available:
- CJ. This plan costs $69/month. It has such features as the creation of up to 100 profiles and personal technical assistance from the company. Pay $ 345 and use it for 6 months. Pay $ 690 and use it for a year.
- Ballas. You will pay $139 for a one-month term for this plan. Pay $ 695 for half a year and $ 1390 for a year. The advantages of Ballas are the ability to have up to 300 browser profiles and team technical assistance.
- Grove Street Families. Its cost is 249 (month)/1245 (six months)/2490 (year). This subscription plan is more for advanced users. Because, in addition to registering 1000 fingerprint profiles and team technical assistance, you get the opportunity to use the Application Programming Interface (API).
Conclusion
So, we figured out why professionals need Aezakmi Browser and all the concepts that are worth knowing. We also showed how to configure the browser so that you can launch and work with it, and told which subscription plans exist. Anyone who wants to start using Aezakmi will definitely find something useful in this article. Good luck using it!
Users reviews


Reviews
There are no reviews yet.